
Building a deck is a great way to add functional outdoor space to your home and increase its value. One of the most important decisions you’ll need to make during the deck installation process is whether to install the deck boards crown up or down.
Crown refers to the natural curve or warp in the wood that occurs as a result of its length. Installing the board’s crown up or crown down can have a significant impact on the stability, appearance and longevity of your deck.
In this article, we will explore the pros and cons of installing deck boards crown up or down and provide some helpful tips to guide you in making the right choice for your deck.
What is the crown of a deck board?
The crown of a deck board refers to the natural curve that runs along the length of the board. This curve is created during the milling process when the boards are sawn from the tree trunk. Because trees are round, the boards cut from them will have a natural curve, with the center of the board being slightly thicker than the edges. This is the crown.
The crown of a board can affect its appearance and performance, so it’s important to install your boards correctly. If installed improperly, with the crown facing the wrong direction, the boards may not be level and could cause the deck to be uneven or unstable.
Therefore, when installing decking, you should look to create a uniform crown across all your boards. Generally speaking, the ideal board crown is about 1/4” in the center of the board. You can also use shims and spacers under individual boards to achieve this if necessary.
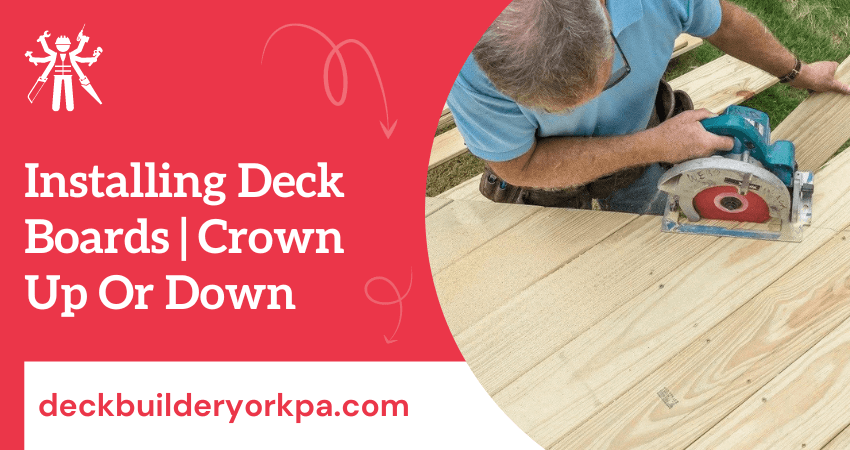
Best Practices for Installing Deck Boards
Here are some best practices for installing deck boards, regardless of whether the crown is facing up or down.
Steps for installing deck boards:
- Plan the layout and placement of the deck boards before installation, taking into account the location of posts, beams and joists.
- Start installation at the outer edge of the deck and work towards the center, using chalk lines or other guides to ensure a straight and even installation.
- Cut boards to fit around posts and other obstacles as needed, leaving a small gap between boards for expansion and contraction.
- Use galvanized or stainless steel screws or nails to attach the boards to the joists, spacing them evenly and avoiding overdriving to prevent splitting or damage.
- Use a level to check the alignment of each board as it is installed, adjusting as needed to ensure a level and uniform surface.
- Trim the final boards to fit the remaining space, leaving a small gap at the edge of the deck for expansion and contraction.
Advantages and disadvantages of installing deck boards with the crown facing up!
Advantages:
- Deck boards with the crown facing up are less prone to warping and cupping due to changes in humidity and temperature, as the sides of the board are protected from direct exposure to weather elements.
- This type of installation also provides a more aesthetically pleasing look, since the deck boards appear more uniform in appearance.
- Installing deck boards with the crown facing up tends to be much faster and easier than installing them upside down, making it a cost-effective approach for homeowners looking to install or replace their outdoor deck surface quickly and affordably.
Disadvantages:
- Deck boards installed with the crown facing up are less resistant to water damage since the sides of the board are exposed and more likely to be affected by moisture.
- This type of installation also does not provide as much stability or support for furniture or heavy objects, since the boards can easily bow inwards with pressure.
- Additionally, deck boards installed with the crown facing up are more likely to contain splinters and protruding nails due to the wood expanding and contracting with changes in humidity. This can be a safety hazard for anyone walking on the deck surface.
- Finally, installing the boards with the crown facing up also increases the risk of tripping hazards due to the boards being unevenly spaced out. This can be especially dangerous on stairs and pathways.
Overall, when considering the pros and cons of installing deck boards with the crown facing up, homeowners should weigh their options carefully to determine which installation option is best for their outdoor space. Ultimately, this decision should factor in cost, appearance, durability and safety.
Advantages and disadvantages of installing deck boards with the crown facing down
Advantages:
- Decreases the chance of cupping due to moisture exposure.
- Prevents separation that can occur when boards expand and contract with temperature and humidity changes.
- Makes it easier to keep rainwater out of the seams between boards, helping prevent rot or decay.
- Provides a smoother surface with fewer nail or screw heads visible.
Disadvantages:
- Can be more difficult to install due to the extra pressure needed to bend the boards downward.
- May require additional support beams or joists along the perimeter of the deck for stability and strength.
- It is more difficult to hide imperfections in the boards when they are installed this way.
- Can be a tripping hazard if the ends of the boards are not properly finished or sanded down.
- Taller decks may require additional bracing along the edges for support.
Overall, installing deck boards with the crown facing down can be beneficial to the longevity of a deck and, if installed correctly, can provide a visually appealing finish for any outdoor living space. However, it is essential to consider all aspects of the project when deciding which way to install your boards to ensure optimal performance and safety.
Comparison Between Crown Up & Crown Down
Here’s a table comparing the impact of installing deck boards with the crown facing up or down on the appearance and structural integrity of the deck:
| Aspect | Crown Up | Crown Down |
| Appearance | May appear flatter and more uniform | May appear slightly wavy or curved |
| Drainage | Creates a natural drainage slope for water runoff | Water may puddle on the surface if the slope is not created |
| Stability | Boards may warp over time, leading to an uneven surface | Boards settle into place, providing a stable surface |
| Structural Integrity | May cause the boards to be less stable and more prone to decay | Boards are more stable and less prone to decay |
| Cost | May require more material due to waste created by trimming | May require less material due to fewer cuts needed |
| Maintenance and Upkeep | May require more maintenance to prevent warping and decay | May require less maintenance due to greater stability |
| Climate and Weather | May be suitable for areas with mild climates and low rainfall | May be suitable for areas with heavy rain and high humidity |
| Personal Preference | Some may prefer the appearance of flat boards | Some may prefer the appearance of slightly curved boards |
It’s worth noting that the impact on the appearance and structural integrity will vary depending on the specific installation and the quality of the materials used. It’s important to carefully consider all factors before deciding which method to use for installing deck boards.
Which one is best: crown up or down?
A deck crown is designed to deflect water away from the roof and building structure. Thus, for most applications, it is best to install the deck crown up so that it slopes downward away from the roof. This helps ensure that water does not accumulate on the roof, which can cause costly damage over time.
On the other hand, for some applications, such as a rooftop patio, it may be better to install the deck crown down so that it slopes upward toward the roof. This way you can have more usable space on top of your deck without compromising drainage.
Ultimately, the best option will depend on your situation. Consult with experience deck builder to determine the best installation for your needs.
Tips for achieving a level and structurally sound deck:
- Use pressure-treated lumber or other materials rated for outdoor use to prevent decay and damage from moisture and insects.
- Choose sturdy and properly sized posts, beams and joists to support the weight of the deck and its occupants.
- Use appropriate hardware, such as hangers and brackets, to attach the beams and joists to the posts, ensuring a secure and stable frame.
- Use a string or laser level to check the alignment and levelness of the posts, beams and joists before installing the deck boards.
- Allow for proper ventilation under the deck by leaving enough space between the bottom of the deck and the ground or other surfaces.
Advice on proper maintenance and upkeep of the deck after installation:
- Regularly clean the deck surface with a broom or brush to remove debris and dirt.
- Use a power washer or deck cleaner to remove stains and mildew as needed, taking care not to damage the wood.
- Apply a sealant or water repellent to protect the wood from moisture and sun damage.
- Check the deck regularly for signs of damage, such as splitting, warping or rot and repair or replace boards as needed.
- Inspect the hardware, such as screws or nails, for rust or corrosion and replace it as needed to maintain the stability and safety of the deck.
FAQs – Installing Deck Boards
What happens if I install my deck boards with the crown facing the wrong way?
If the crown of your deck boards is installed facing the wrong way, it can cause several issues. The boards may be more prone to cupping and warping due to unequal exposure to moisture on either side of the board. This can lead to an uneven surface when walking across the deck and create a tripping hazard.
It can also cause difficulty in fastening and laying out the boards to ensure a properly spaced and level deck. It is important to consider your local climate, as well as the direction of sun exposure when deciding which way to install your boards, ensuring that you select the proper side for optimal performance.
What is the recommended gap between deck boards?
When installing deck boards, it is important to maintain consistent spacing between each board. The gap should be at least 1/8″ for decks that will never be exposed to water and up to 3/16″ for decks that may be exposed to occasional moisture or drips from cleaning.
This ensures that the wood has room for expansion and contraction due to changing weather conditions. Additionally, proper spacing can help create a more professional and finished look for your deck.
Can I mix the orientation of the crown on my deck boards?
Yes, you can mix the orientation of the crown on your deck boards. This is known as a “picture frame” pattern and results in an attractive look that is popular among many homeowners. However, it is important to ensure that your spacing between each board remains consistent no matter which way they are facing.
Mixing the orientation of your deck boards can also help to reduce the amount of cupping or warping from weather exposure. This is because different orientations cause the boards to expand and contract differently due to their varied exposure to sun and rain. Overall, mixing the orientation of your deck boards can create a beautiful pattern that helps protect your wood from warping.
Wrap Over
Generally, it is recommended to install deck boards with the crown (or the curved side of the board) facing up. Install deck boards crown up or down ultimately depending on the type of wood being used and personal preference. Some types of wood such as pressure-treated pine, are better-installed crown down to minimize cupping and warping, while others like cedar are better installed crown up to allow for better drainage and prevent water from collecting on the boards.
Ultimately, careful planning and consideration are necessary to ensure that deck boards are installed in a way that will provide the best long-term performance and aesthetic appeal.